Starting a blended learning course
This book shows the basics of using Moodle to create a blended leaning course, beginning with Books.
| Site: | Tai Poutini Polytechnic |
| Course: | eLearning Course Development |
| Book: | Starting a blended learning course |
| Printed by: | Guest user |
| Date: | Saturday, 10 May 2025, 4:59 PM |
Table of contents
First Steps - Finding the Development courses
We covered a lot of stuff in our first session. This book is intended to quickly revise what we did.First, log into Moodle: http://vle.tpp.ac.nz (by reading this book, I'm assuming you've already done this step
- At the top of the Moodle home page, click the Courses Menu, then Choose List of All courses

This will take you to the list of all the course categories we have set up. Ours are under Course Development.
- Scroll to the very bottom of the page and locate Course Development. Click it to see all the courses we created.

All the courses we created are on display. Only ourselves and Moodle administrators can see these.
- Click a course to view it.

Creating a new course
On the course category page, you can create a new course.
- Scroll to the bottom of the page.
- Click the New Course button.

Tip: When the time comes to move your courses into a live environment, the Moodle Admins will set you up with your own category.
Course Details
When initially setting up a course, you don't need to do much. Just give it a long and short name.
- The long name appears at the top of the page and should be the title of the unit, paper or course.
- The short name needs to be unique in Moodle. It's best to name it with the unit number, prefexed with the year and maybe semester or term is is delivered in.
For example, Unit standard 18740 might have the long name "Writing a Computer Program to Solve a Problem" and a short name of "2016-us18740".
- Everything else can be left for now. You may want to put a description of the course in at this time, but it can be added later.

Now to save the course.
- Scroll to the bottom of the Add a new course page.
- Click Save and Display.

A new, empty course
A new, empty course appears as shown below. It starts off with 4 empty topics.
We wont be using topics as a traditional course on Moodle, but we'll get to that later.
- You can start adding resources to your course by clicking the Turn Editing On button

Changing a courses settings
- You can return to the course settings at any time to change it's name, description, start date, etc. from the Edit Settings option in the Administration block.
- You can also turn editing on or off from the Administration block.
- FInally, the admin block is large and not needed often. You can hide it by docking it to the side of the screen with the Dock arrow at the top right of the block.

Below shows how the docked block appears. Click it to open.

eBooks
The eBook resource is arguably the most important content resource in Moodle. With this resource you can provide all the reading for your students, but also provide access to other resources such as interactive lessons, videos, documents such as PDF files and forms and also access formative assessments such as quizzes.
The key trick with these books is not to make the individual chapters too long. Instead organise them into shorter, focused chapters on a single topic and add as many chapters as needed.
Creating an eBook
Start on your course page in a topic (it doesnt matter which, but I recommend keeping related books together in a single topic).
- Turn editing on.
- Click Add an activity or resource

- Scroll to the bottom of the list and choose Book then click Add.

eBook details
Just like a course, the first page you're presented with when creating a new eBook is the details page.
Again, you only need to fill in the name. Everything can be changed later.

Once you're happy with the details, scroll to the bottom of the page and click Save and Display

Adding your first chapter
You must fill in the details for the first chapter:
- The name of the chapter
- The chapters text.
We'll discuss more about using the editor in a bit. The first chapter is generally an introduction to the book itself.

You don't have to put all your content in at once, but you do need something in here. Once you're done, click Save changes.
Adding and editing pages
Once the first chapter is in place, you can start adding and editing more.
When editing is turned on, the books Table of Contents will have a set of editing icons: Edit, Delete, Hide and Add.


In addition, as you add more pages, the change order options will become available: Move up and Move down.

Book navigation
In addition to the Table of Contents, eBooks have next and previous page navigation icons:

If the navigation arrows are hollow, if means there is no page to go to in that direction.
Sub chapters
Sub chapters are ways of organising information a little better inside a book. A sub chapter appears indented in the table of contents.
- Create a sub chapter by ticking the option when adding or editing a chapter.

A sub chapter appears as shown below in the table of contents.

Printing
eBooks have a special feature that makes it possible to quickly and easily print the whole book or to copy it into another document.
- In the eBook Admin Block, locate Print Book

The book is loaded in a new window with all chapters together for easy printing. Hold down the Ctrl Key and tap P to print.
Using the Editor and general tips
Moodle's editor is capable of formatting rich text and advanced users canget in under the hood and directly edit the code using web standards (HTML and CSS).
- It is a bad idea to do all your editing directly in the editor. Instead,
- Use a word processor that allows for good spelling and grammar checking.
- Keep saved copies of these files
- When they're ready, copy them across and paste them into your books
- Keep the book chapters reasonably short. We don't want our users to have to scroll too much. A rule of thumb might be just a single topic heading per chapter.
- Tools like Microsoft Word add some unexpected formatting to the pages which copies in the background to Moodle. There are tools to clean this up such as HTML Cleaner, which we'll look at later.
- Images will not copy across at all and will have to be done manually.
The next few chapters introduces some of the important but less obvious features:
- Links
- Files
- Images
Full screen
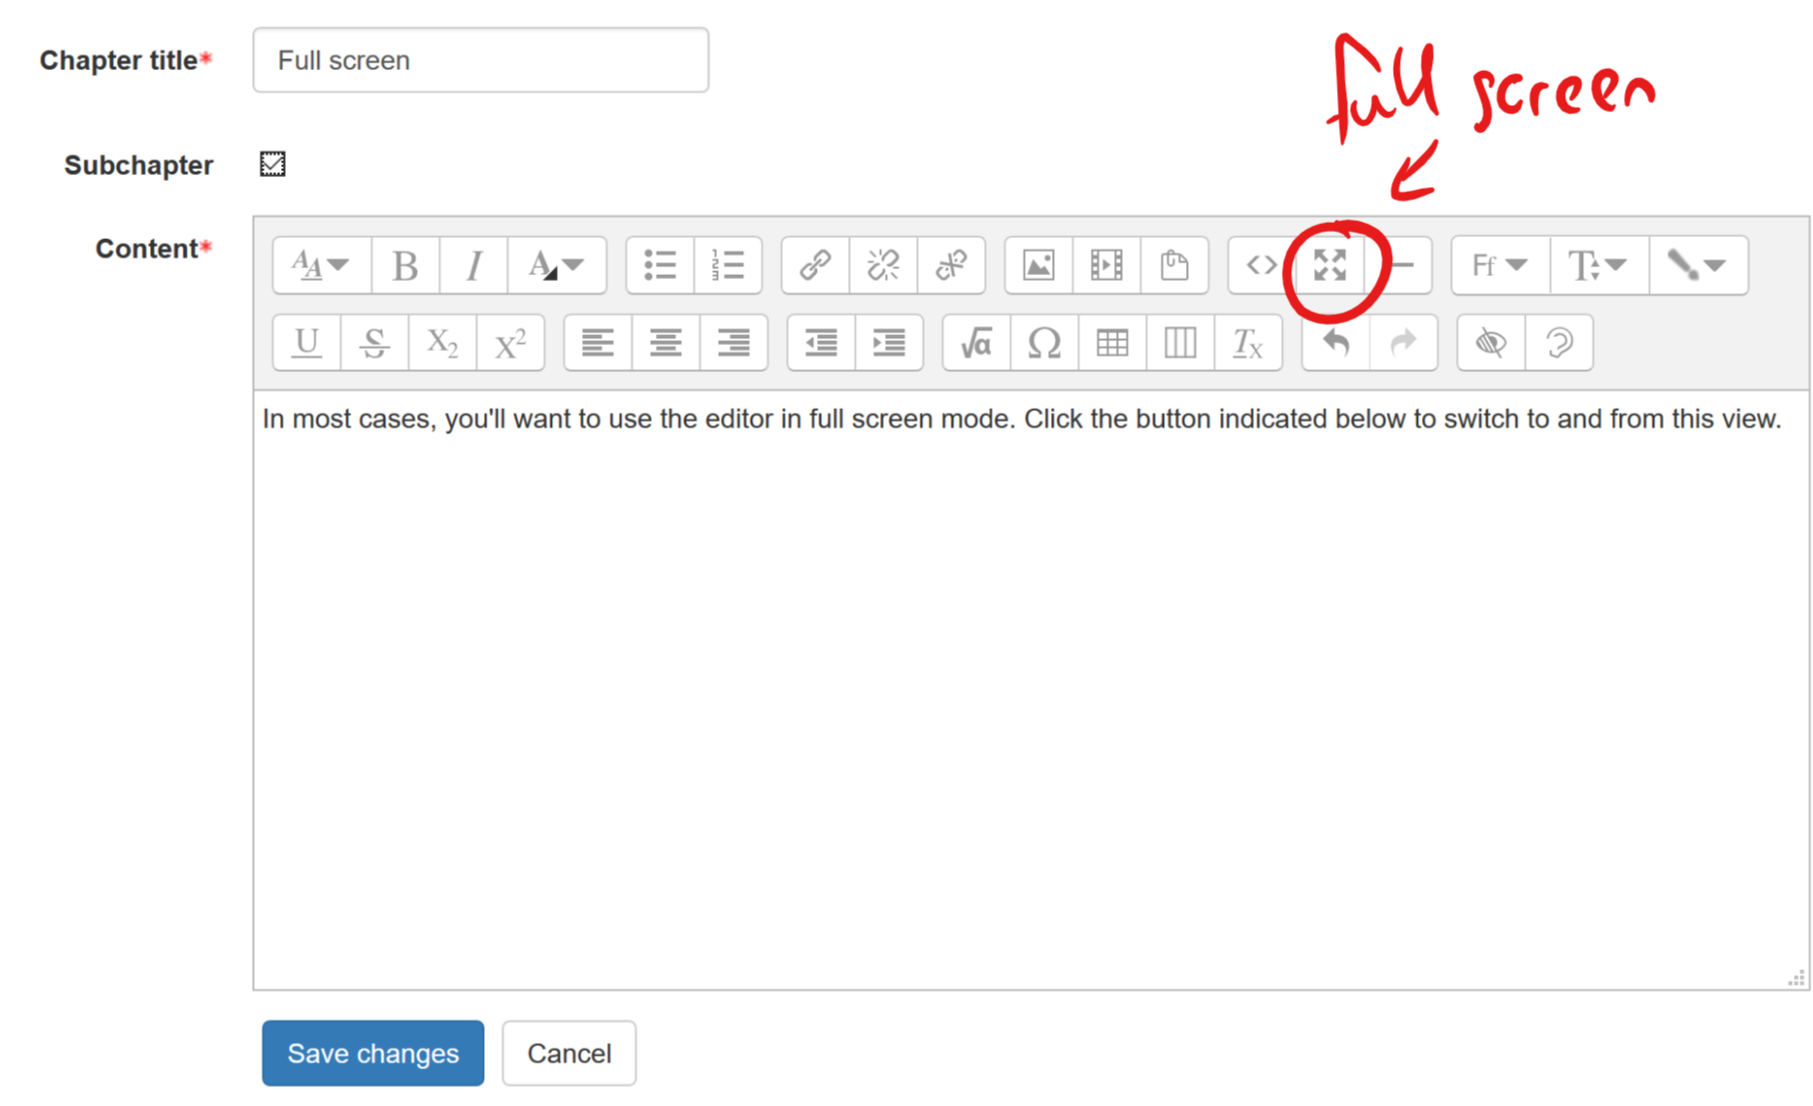
In most cases, you'll want to use the editor in full screen mode. Click the button indicated below to switch to and from this view.
Links to web pages and resources
You can easily create a hyperlink to resources on your Moodle site or on other sites.
- Browse to the page you want to link to.
- Click in the address bar of your browser and copy the address (Called a URL) with Ctrl-C
- In the Moodle editor, highlight the text that will become the link.
- Click the Link button on the editor tool bar.

- Paste the link into the box indicated below and tick Open in new window.

- Click the Create link button to finish.
Removing a link
- You can remove a link at any time by clicking anywhere inside the link and clicking the Unlink button on the editor toolbar.

Linking to files
In addition to hyperlinks to Moodle or web resources, you can also upload and link to files. These might include a PDF copy of a book, forms that need filling out, etc.
For example, click here to open a PDF of this eBook.
- Select the text to become the link.
- Click the Link button on the editor toolbar.
- Click "Open in new Window" then click Browse Repositories.

Repositories are where all files for yourself, the current resource, course and even site are to be found. There are some special repositories which may be available such as Dropbox, Google Drive, etc.
For now, only two matter:
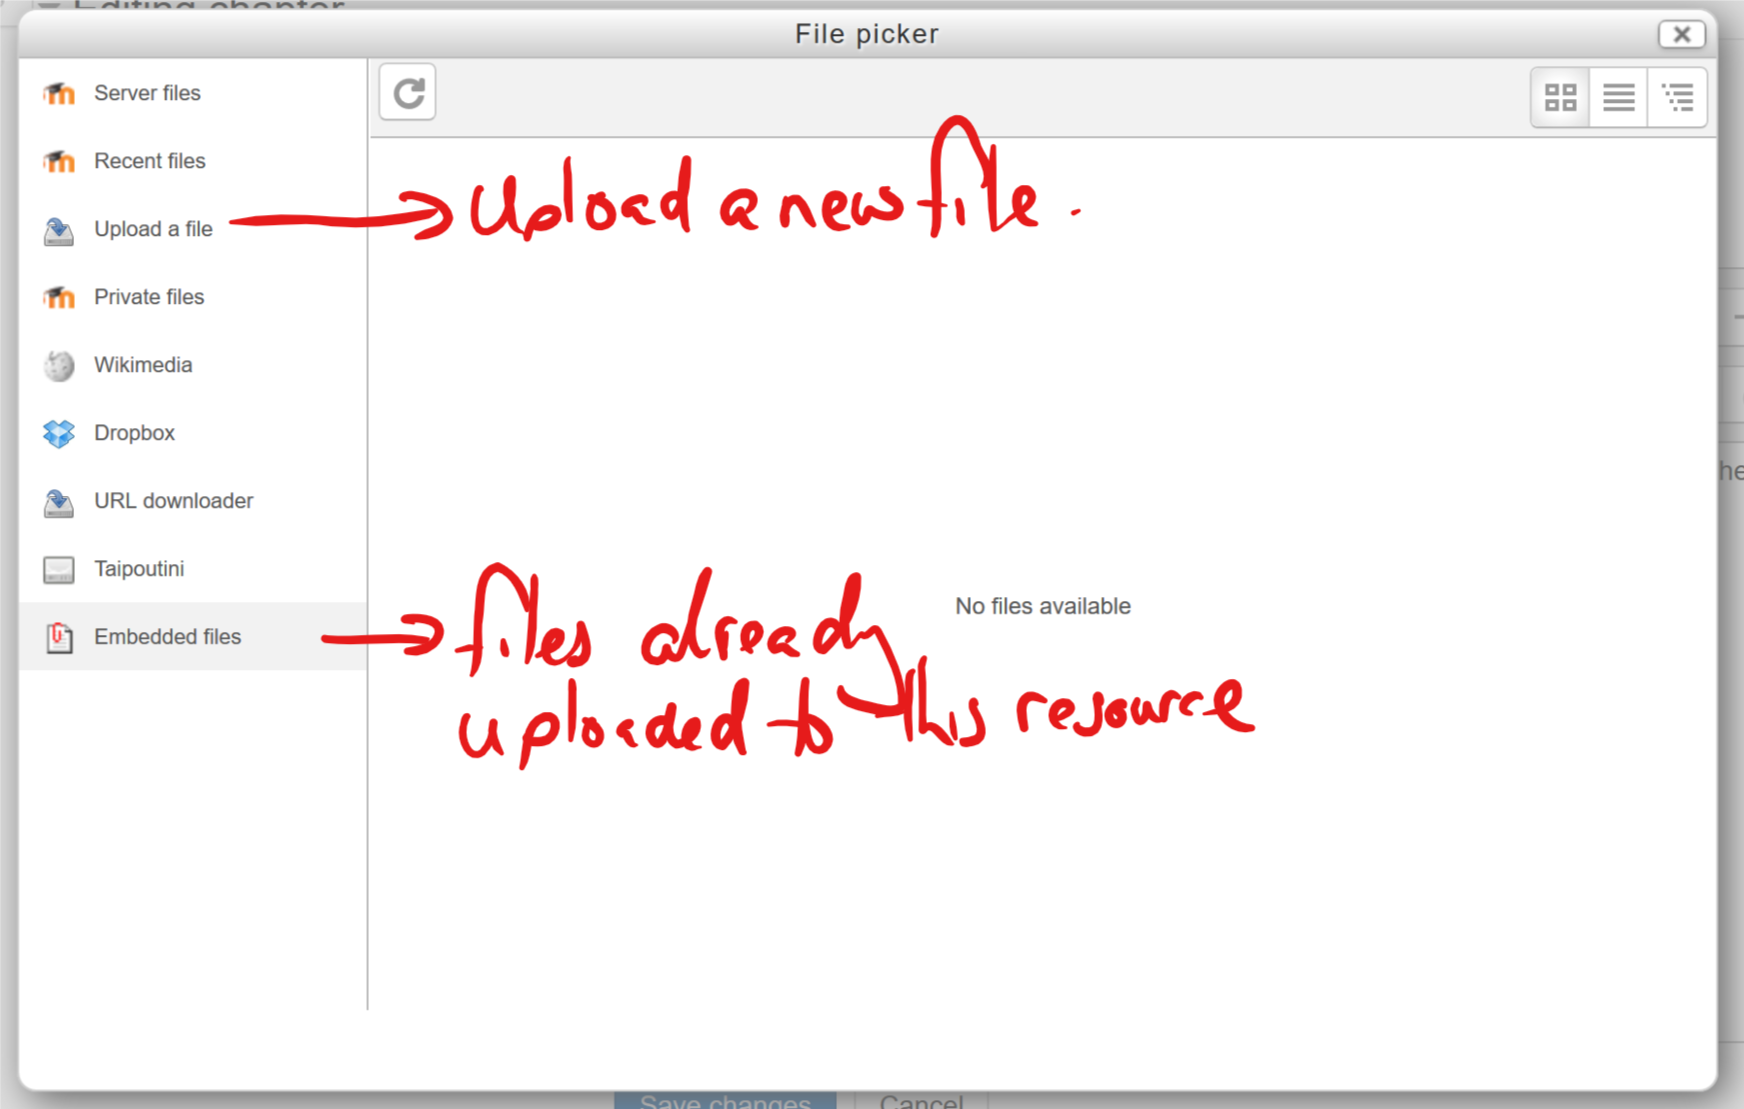
- Embedded files contains all the files already uploaded to the current resource, in this case an eBook.
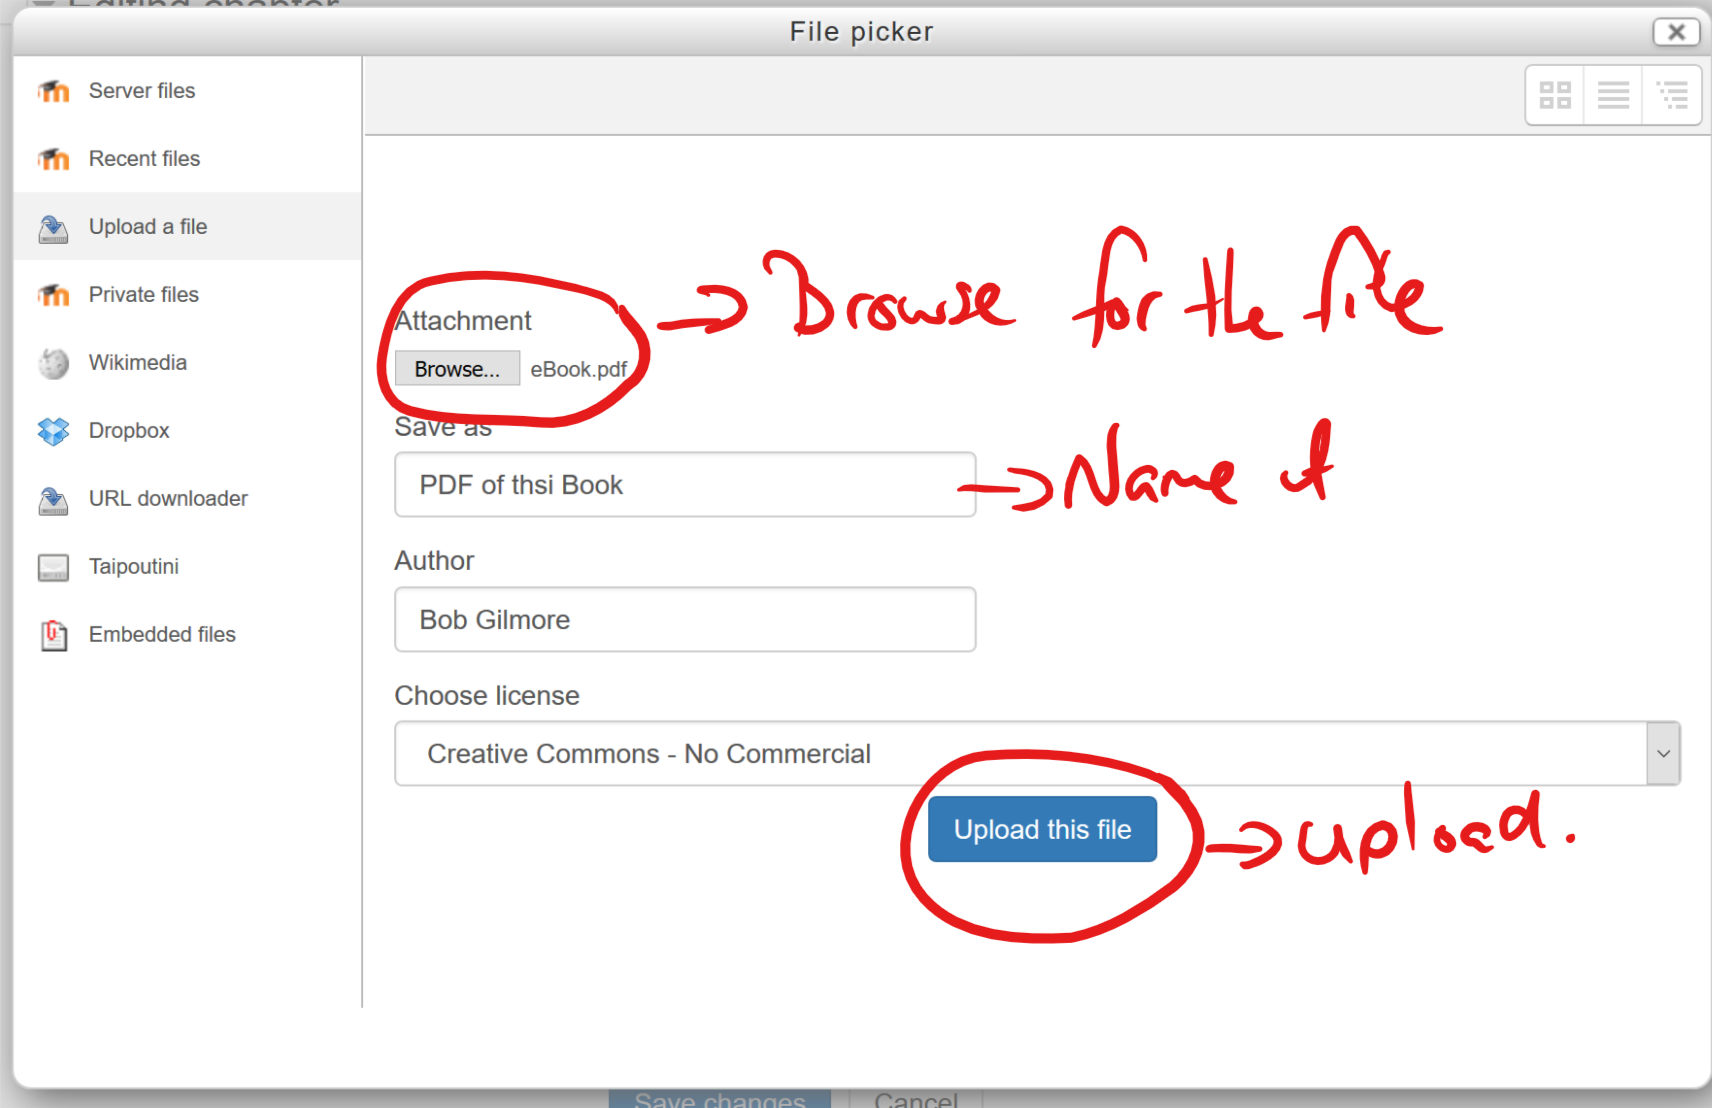
- Upload a file allows you to do exactly that.
Inserting images
Images can be inserted by dragging and dropping them onto the editor or by clicking the Image button on the editor toolbar.

Images work exactly like links (and you can make an image a link). Either pick a web address to an existing image, for example, off Flickr or imgur, or upload one of your own.
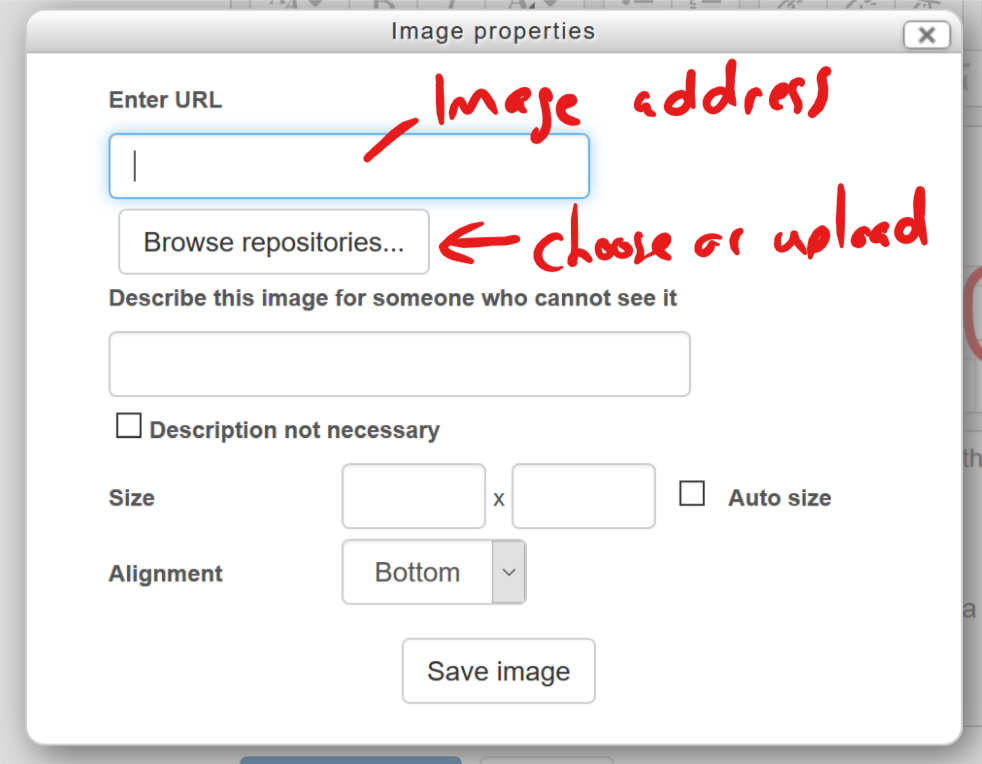
When working with images, try to resize them to an appropriate size before uploading them, using a tool such as Photoshop or an on-line picture resizer.
- You can edit a pictures setting at any time by clicking the picture and clicking the Image button on the editor toolbar.
Managing files
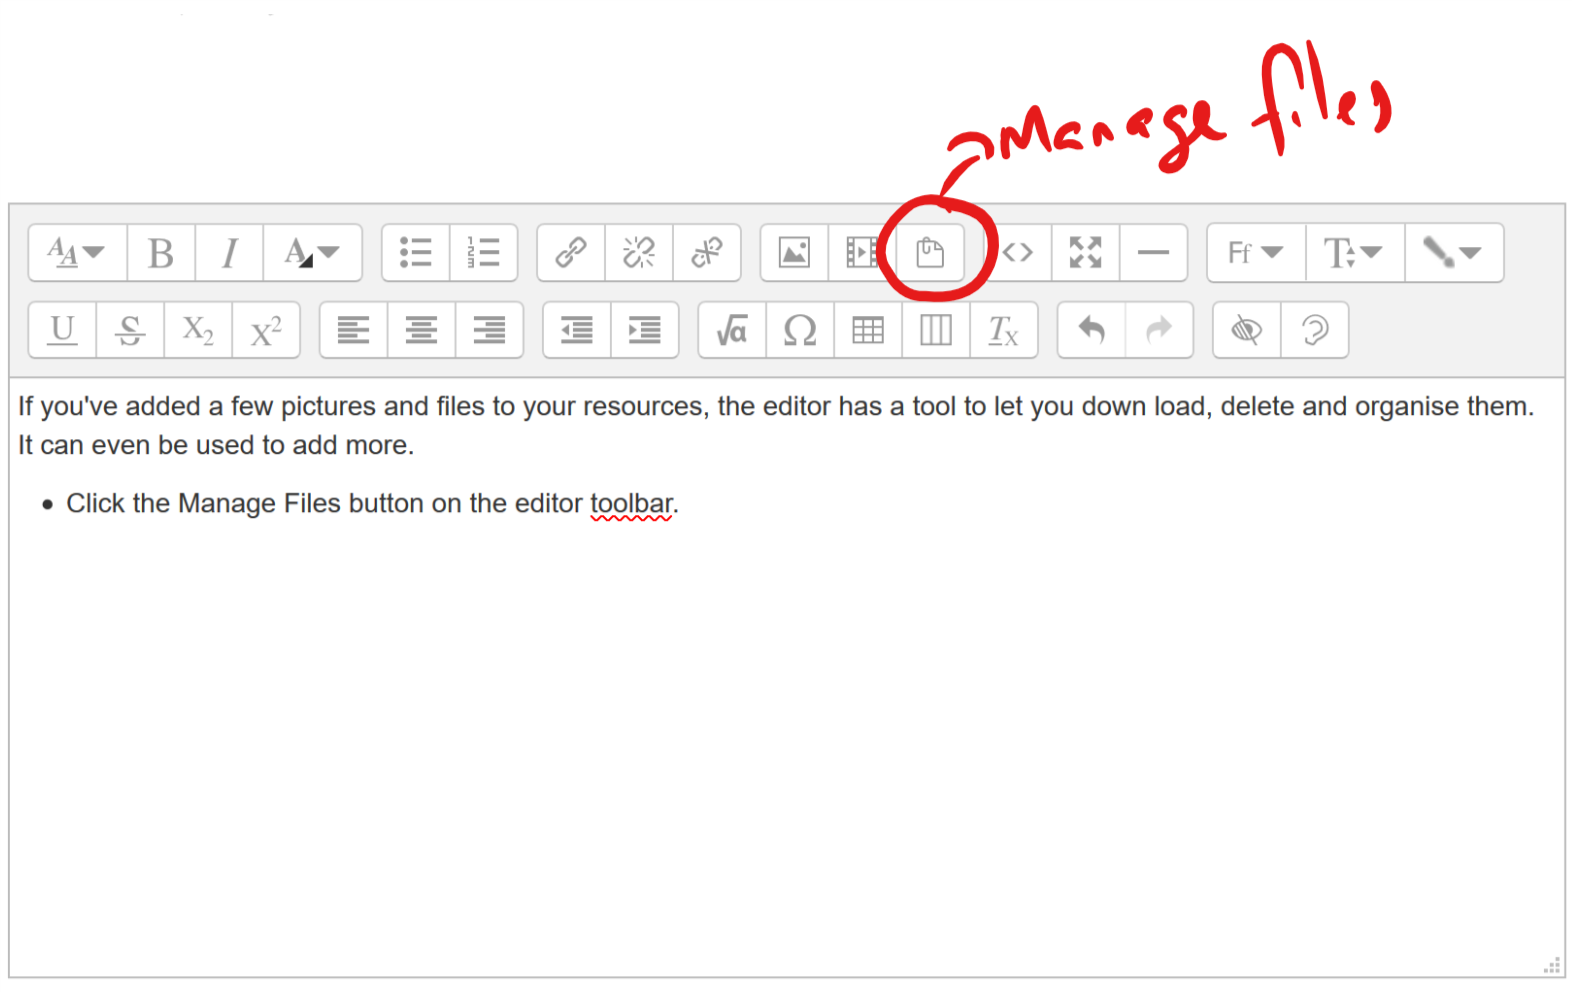
If you've added a few pictures and files to your resources, the editor has a tool to let you down load, delete and organise them. It can even be used to add more.
- Click the Manage Files button on the editor toolbar.
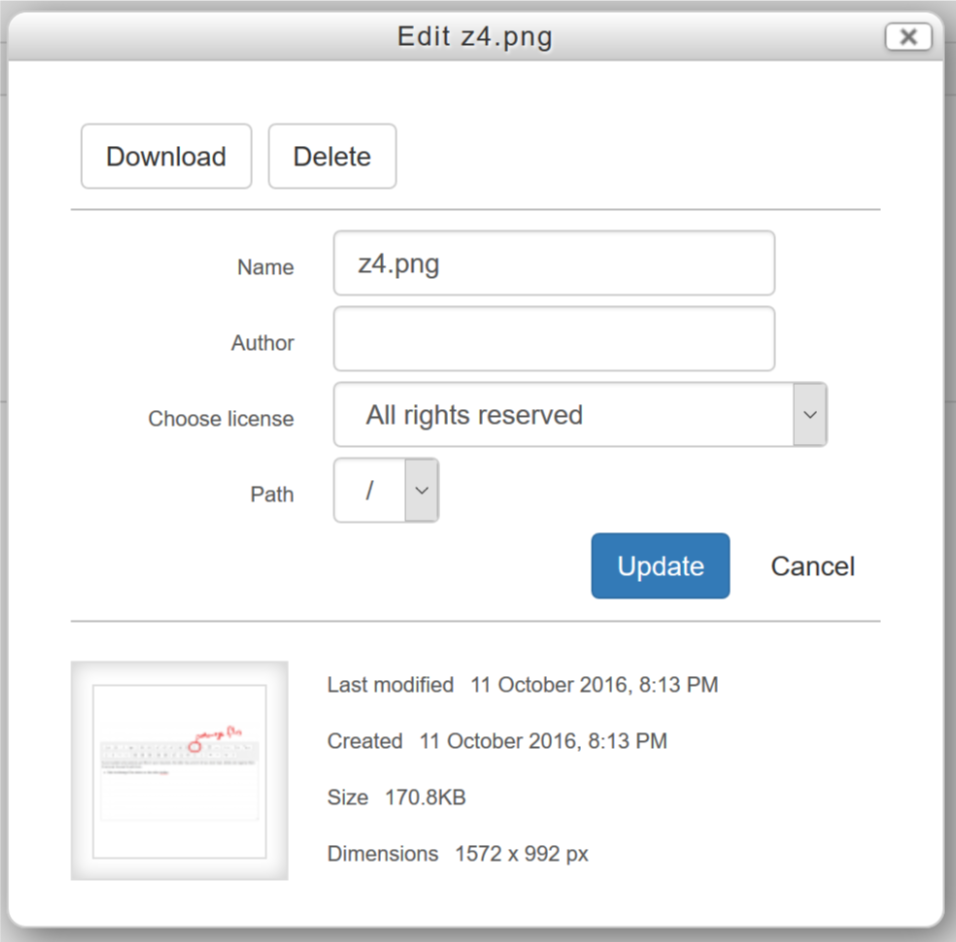
The manage files window is shown below with the image file in this eBook chapter.
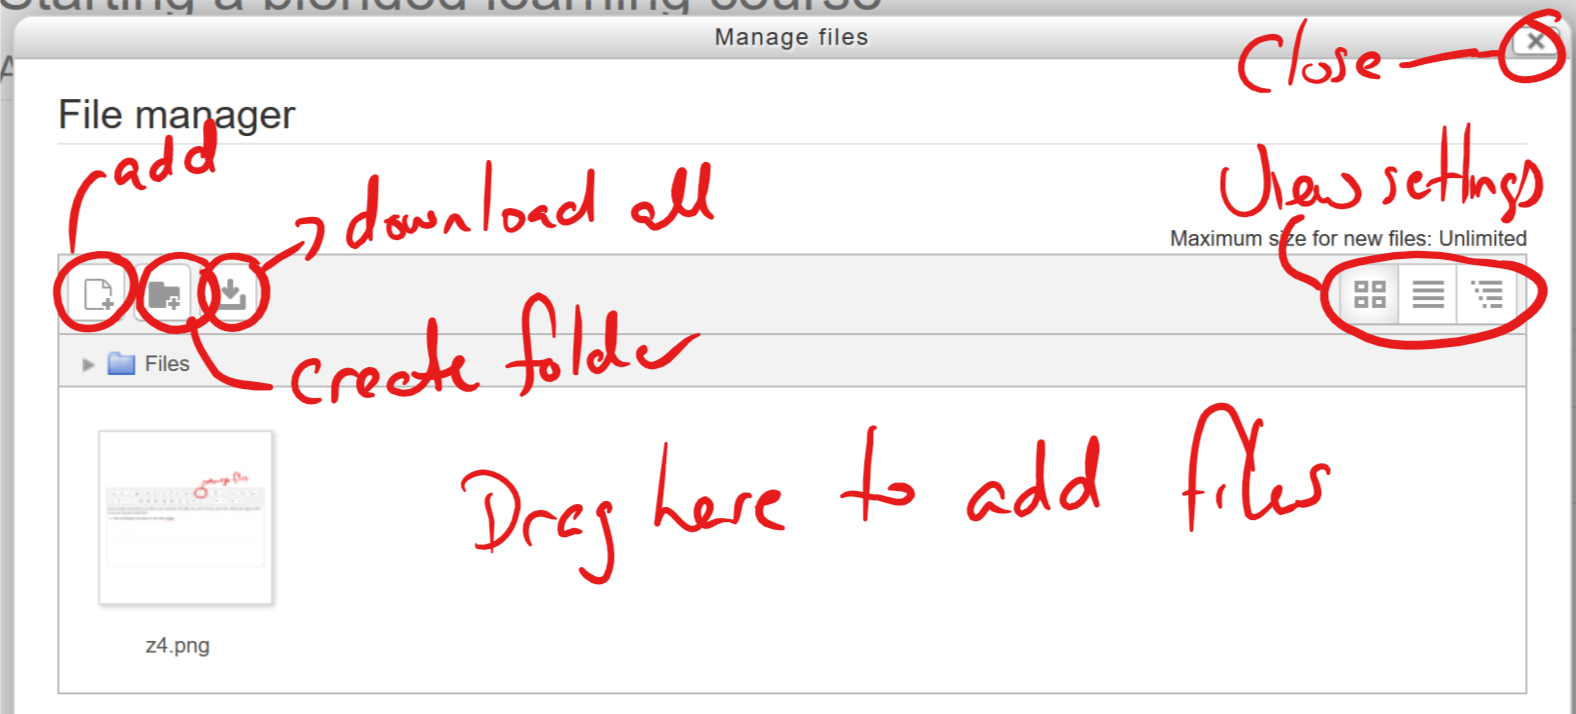
- Right clicking on a file lets you download it, delete it or rename it.
